Advanced Theme Control Panel for Easy Operation
What is Theme Option?
WordPress Theme Option offers a simpler way to manage text and sections like logo, favicon, Google analytic code, sliders, header/footer sections and more. Editing all the template files and custom themes is not required as in one single panel and edit links shows up all throughout a site. Theme Option has come up with a wide range of Options which is compatible with any project. They easily fit it making it simple to use. You just need to add Theme Option to your WordPress page and it will be accessible via the theme options page.
Benefits of using Theme Option
Theme Option lets you use a powerful Theme Administration page. This page consists of all types of functionality such as a simple text field, Date Pickers and file upload fields. It allows creating repeatable fields, tabbed sections, custom galleries, a CSS editor and much more. You can build whole administration options and custom metaboxes for your custom post types and taxonomies in very little time. This is the benefit of Theme Option. It provides you with a lot of pre-configured options types that can be used on your themes in minutes and not hours.
Key-Features
Everyone can make use of few advanced options like:
- Category Checkbox
- Category Select
- Checkbox
- Color Picker
- Custom Post Type Checkbox
- Custom Post Type Select
- Date Picker
- Date Time Picker
- Gallery
- List Item
- Numeric Slider
- Page Checkbox
- Page Select
- Post Checkbox
- Post Select
- Radio
- Radio Image
- Select
- Sidebar Select
- Slider
- Social Links
- Tag Checkbox
- Tag Select
- Taxonomy Checkbox
- Taxonomy Select
- Text
- Textarea
- Textarea Simple
- Textblock
- Textblock Titled
- Upload
Steps to Manage WordPress Theme Option
- Sign in to the WordPress Administration Panel
- Select the Appearance tab
- Choose Theme Options
Examples
Text Area Field Custom Settings:
- Check for Appearance tab
- Choose Theme Options
- Then come down to the Text Area Field Custom Settings
- You need to edit text from the text area. After this is done, save your changes.
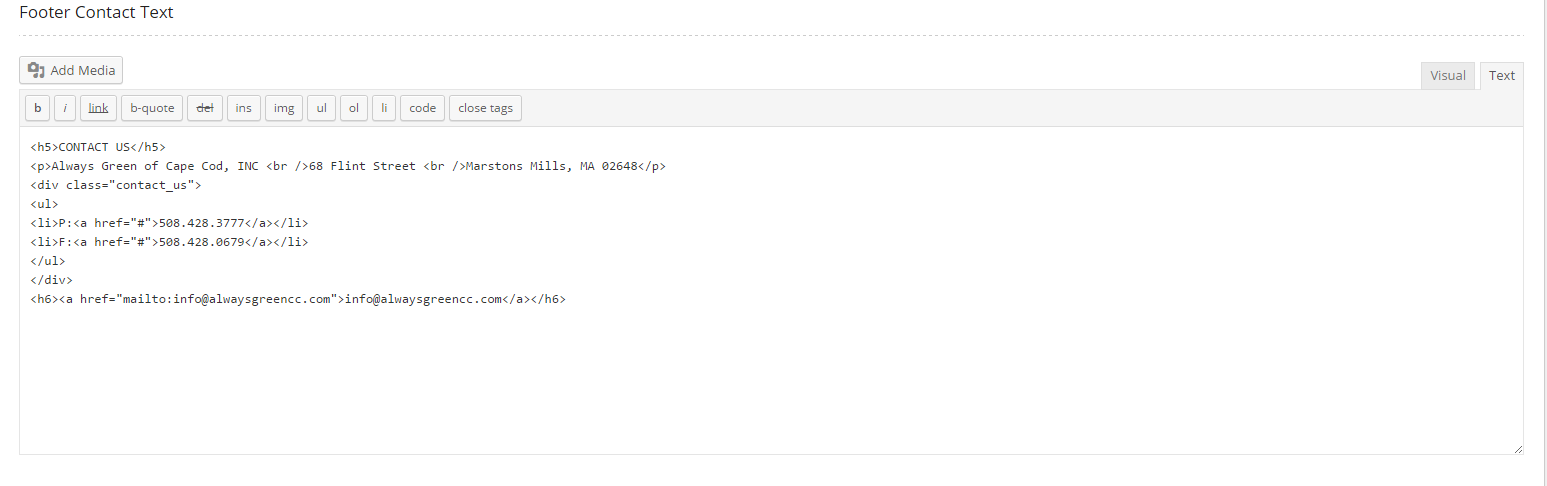
Copyright Custom Settings:

- Choose Appearance tab
- Go to Theme Options
- Come down to the Text Area Field Custom Settings
- From the text area, edit text and save your changes.
Favicon Custom Settings:

- Go to Appearance
- Opt for Theme Options
- Scroll down to the Favicon Custom Settings
- Modify Favicon and save your changes.
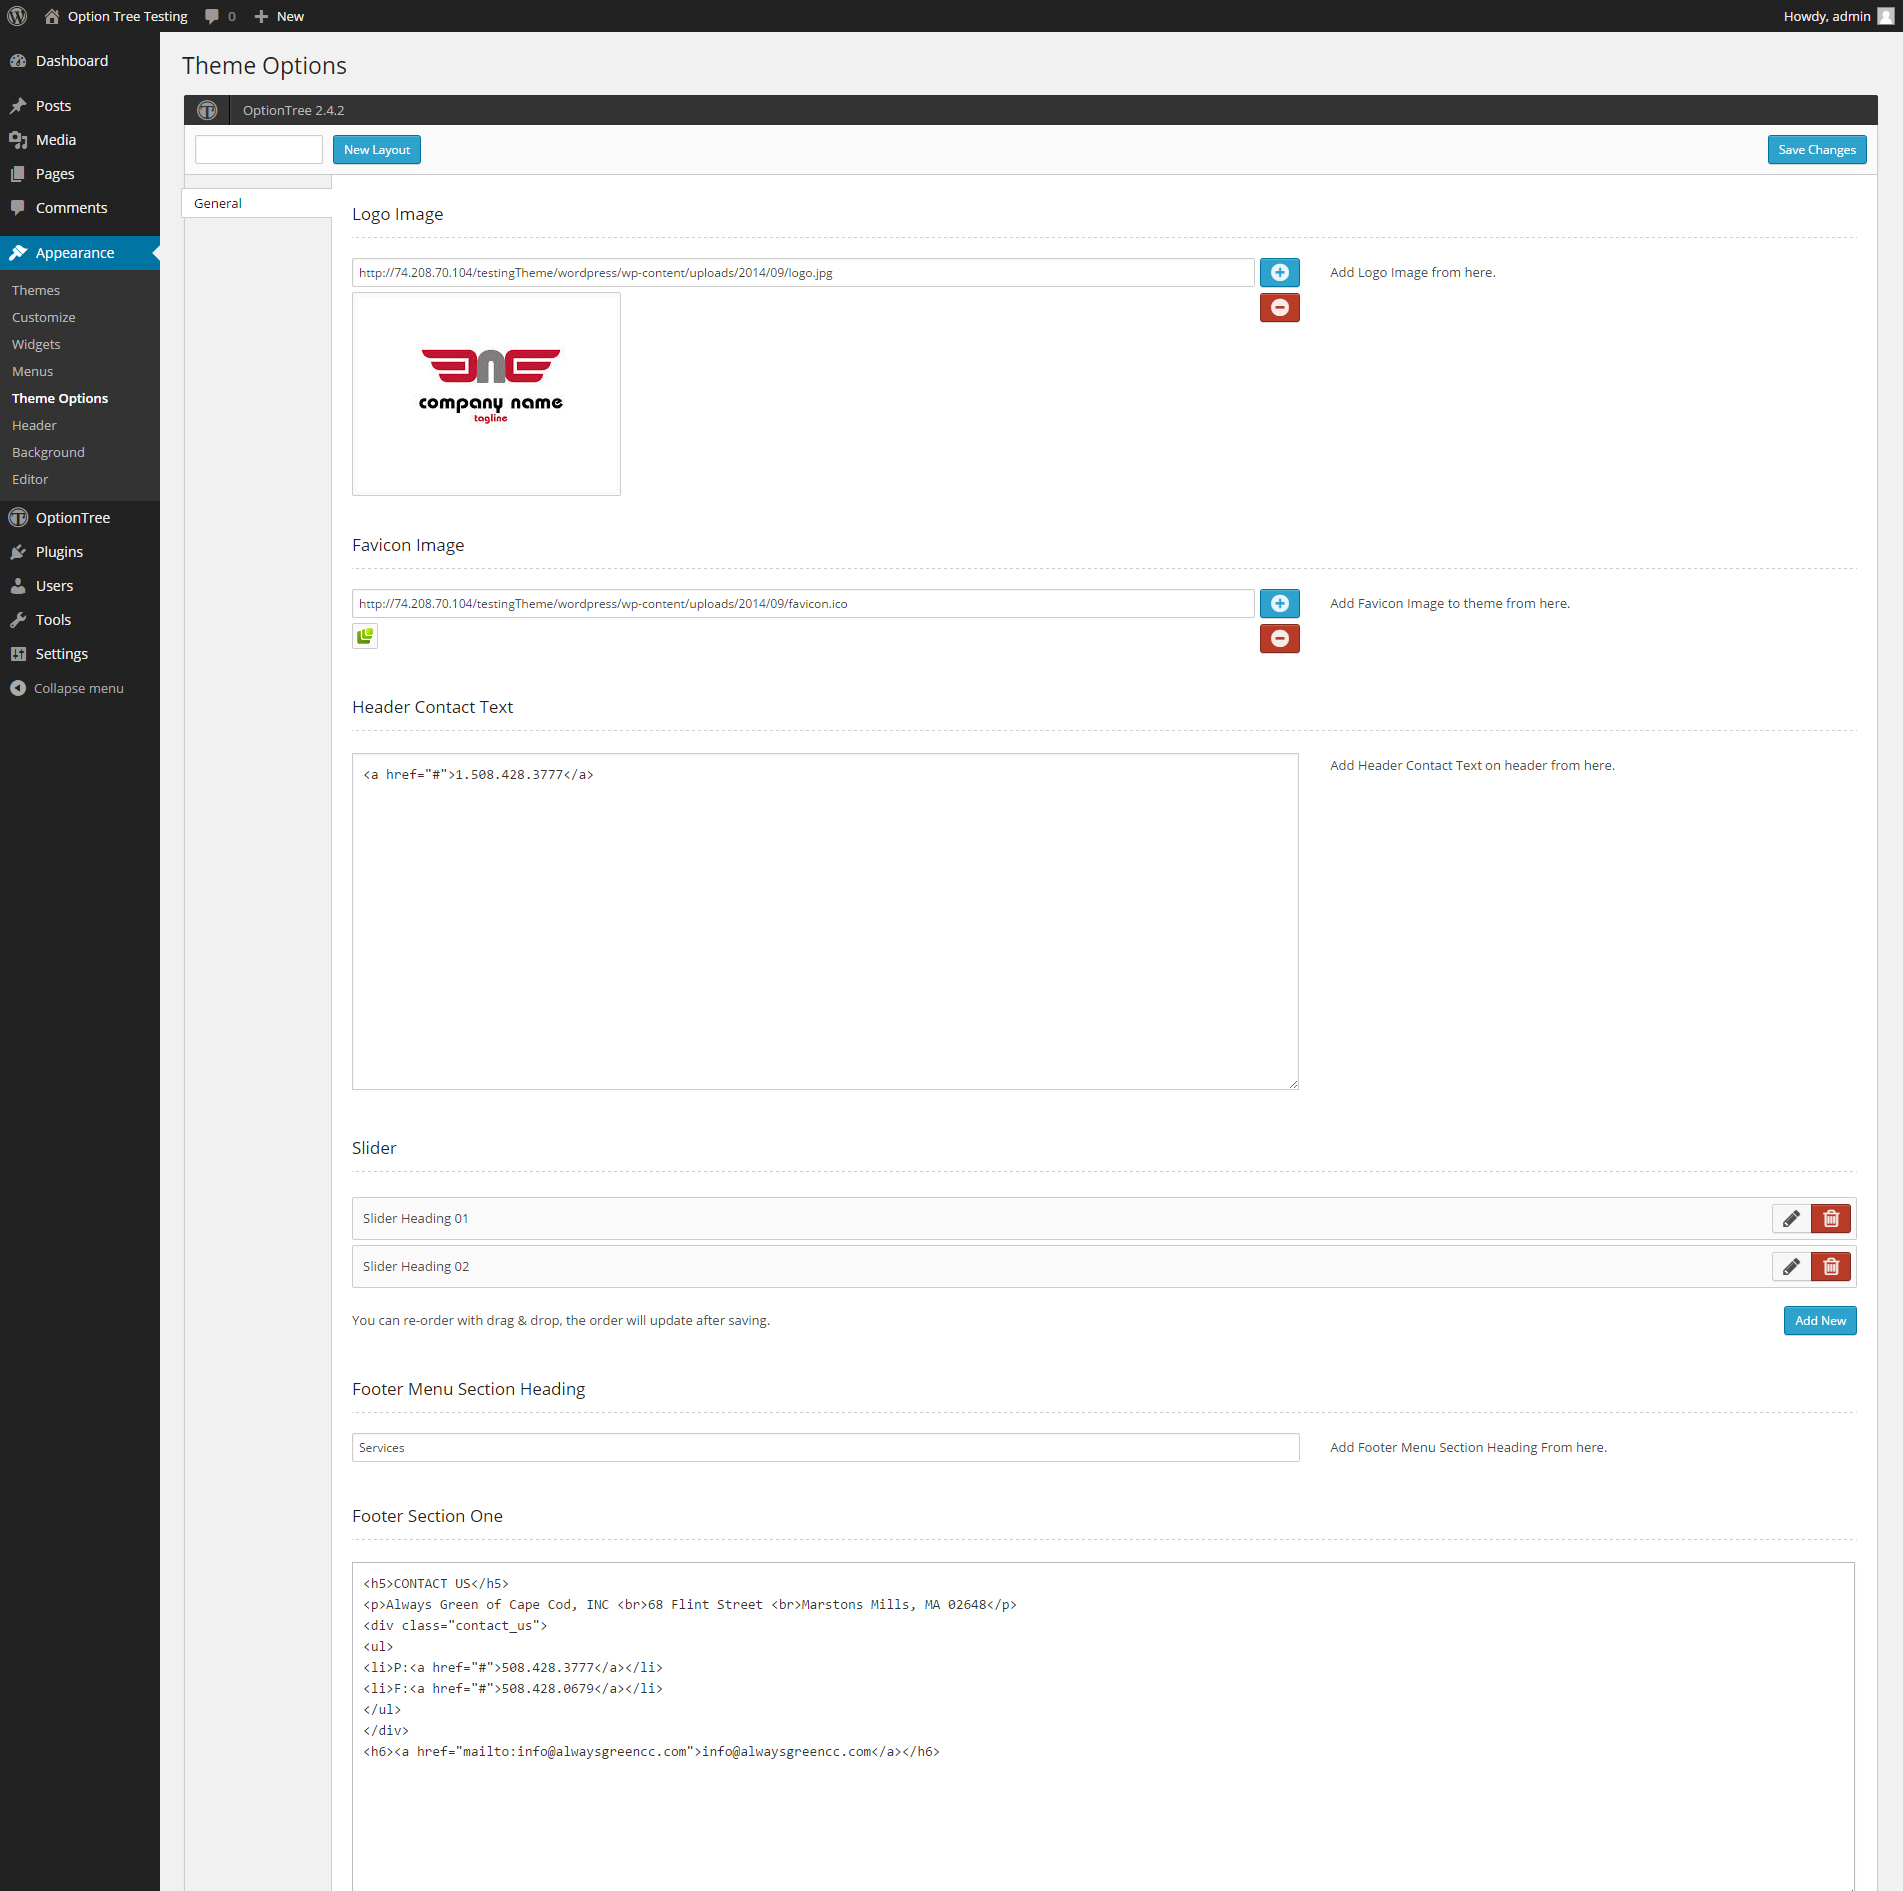
Logo Image Custom Settings:
![]()
- Select Appearance
- Go to Theme Options
- Then go down to the Logo Image Custom Settings
- Alter Logo and save your changes.
Google Analytics Custom Settings:
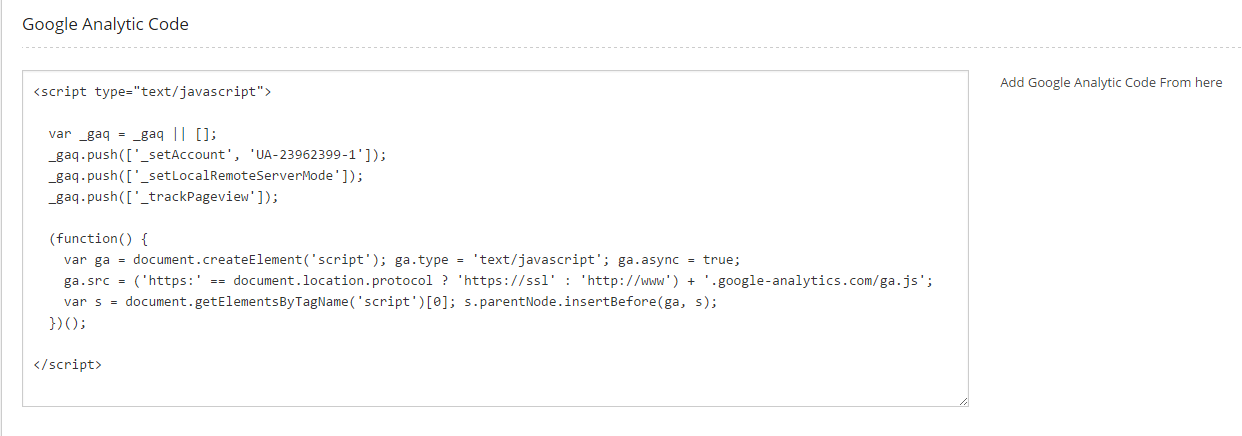
- Go to Appearance
- Choose Theme Options
- Then come down to the Google Analytics Custom Settings
- You can amend Analytics code from the text area and save your changes
Menu Option Custom Settings:

- Select Appearance
- Opt for Theme Options
- Then scroll down to the Menu Option Custom Settings
- You can put in/correct Menu code and save your changes
Social Links Icons Setting:
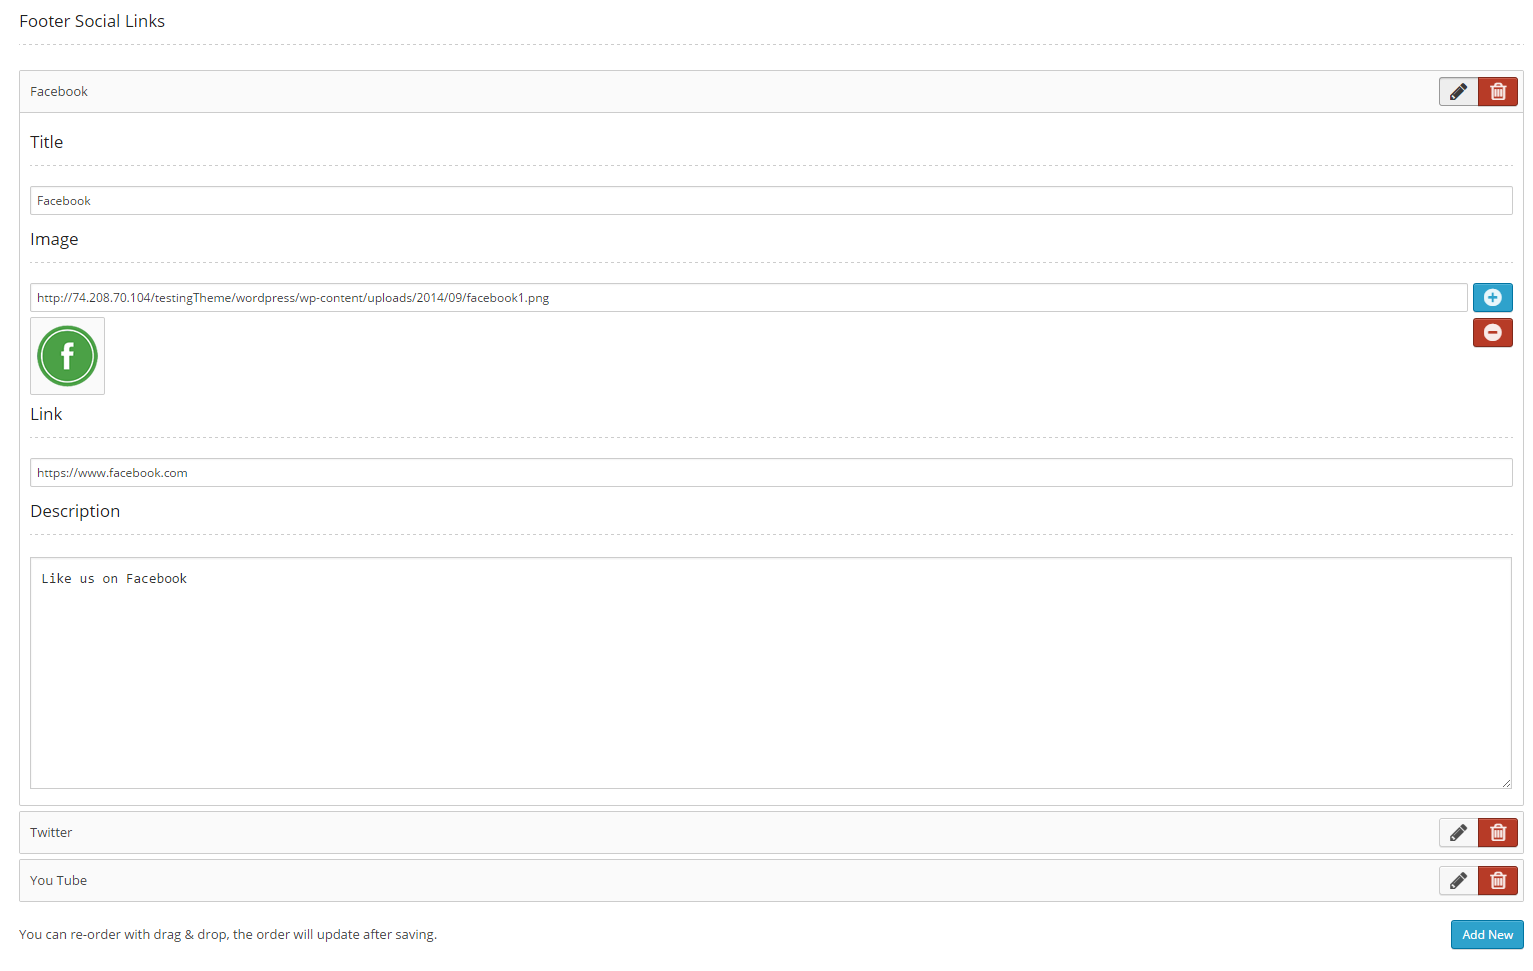
- Go to Appearance
- Select Theme Options
- Then go down to the Social Links Icons Setting
- Add/Edit social links, icons and save your changes.
* Xhtmlchop Theme option is powered by WordPress Option Tree
- Comments
- Leave a reply
Recent Posts
Follow us and get latest updates!
-
Email Updates